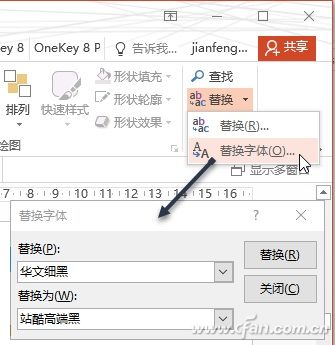
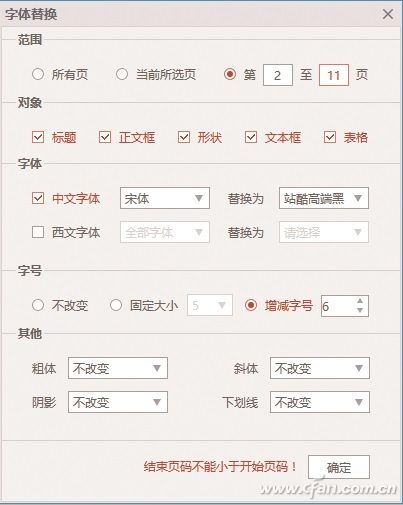
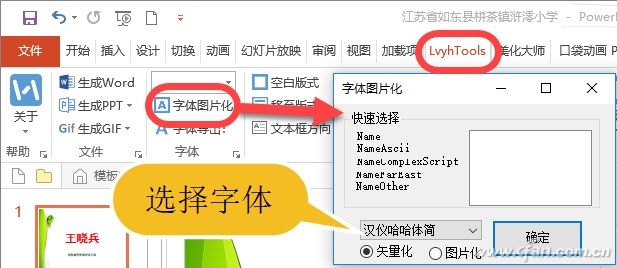
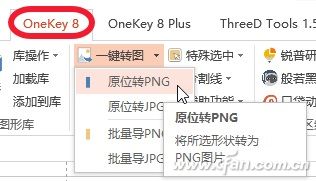
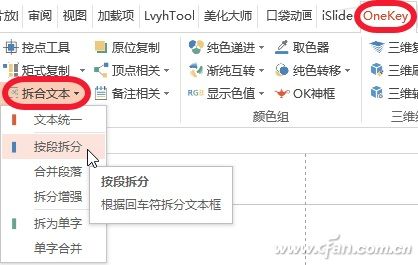
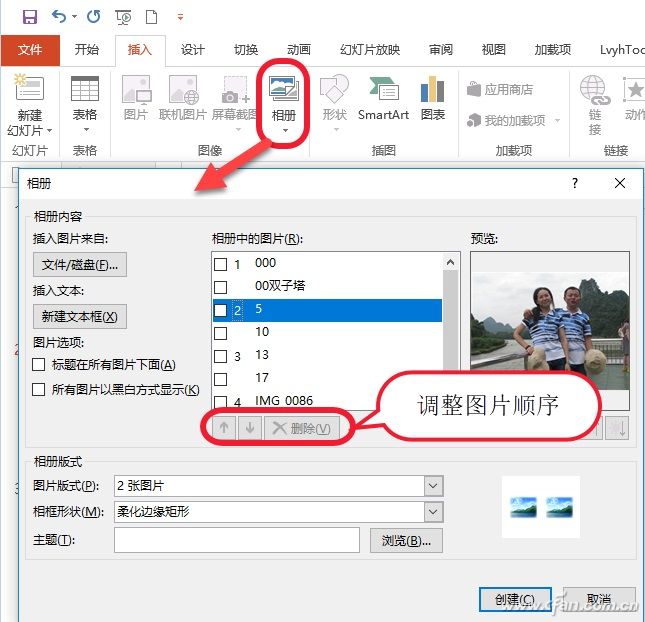
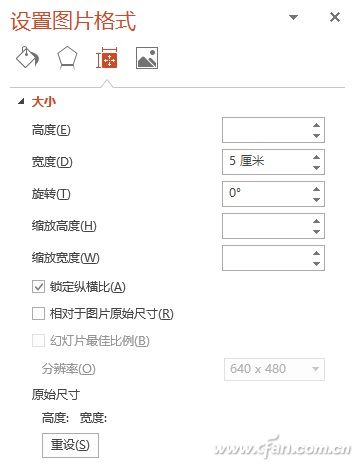
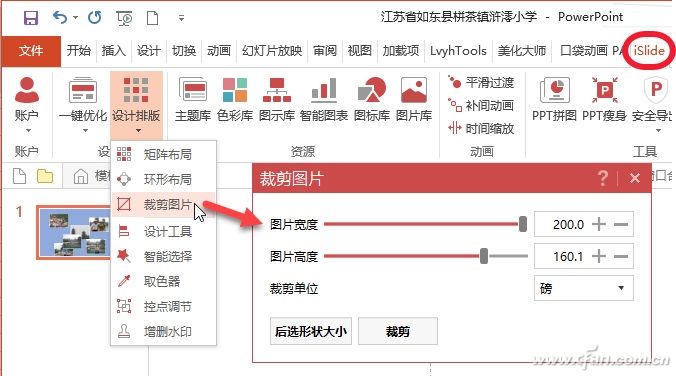
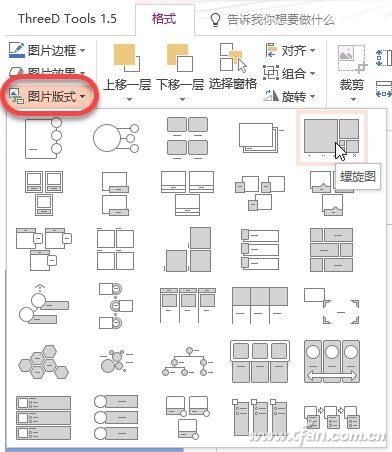
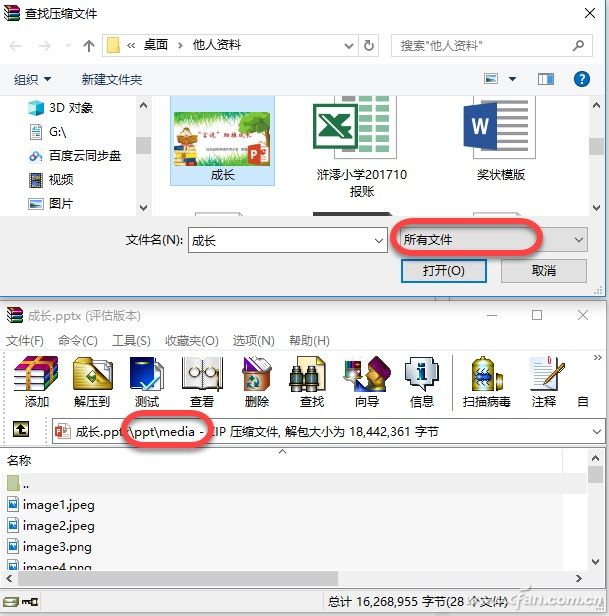
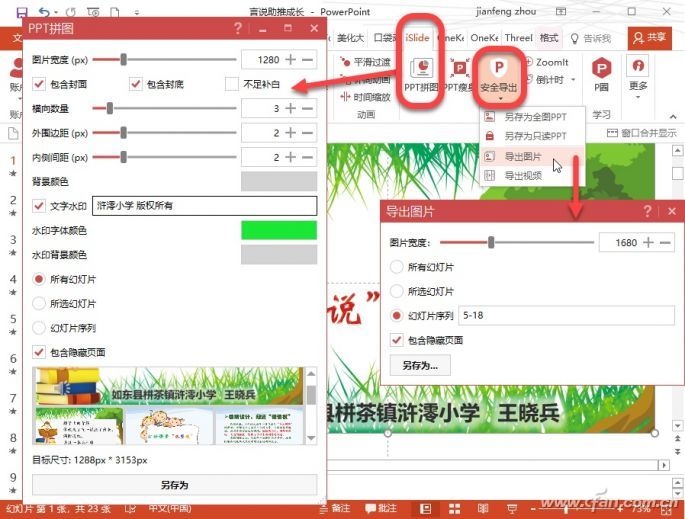
With the same PPT, it was completed in one hour, but it was wanted overnight. Why is the gap so great? Apart from the aesthetic gap, the biggest problem is the degree of proficiency. The same operation, the master may only take 5 seconds, while the rookie to 10 minutes, especially in the later modified to better reflect this gap. To study its roots, masters often accomplish the repeated labor through batch operations, which can undoubtedly achieve the effect of one-time, half-time and half-time. Text format batch conversion Tip 1: Set fonts or font sizes in bulk PPT comes with the font replacement feature, switch to the "Start" tab, click the "Replace" button to select the "Replace" font, you can replace all the fonts in the document with a re-designated font (Figure 1). However, this replacement function is still relatively simple. With the "font substitution" function of the "PPT beautification master", it is more intelligent and powerful to switch to the "beauty master" tab, and click the "replace font" button to pop up a dialog box (Figure 2). In the "range" can be set to replace the range, adding the current page and the page to the first page; in the "object", you can choose to change the replacement target for the title, text box, shape, table, etc., For example, just replace the title The font size of the font will not affect other related texts; in the font size, the size of the font can be fixed, especially if the font size is increased or decreased based on the original font. This function is very user-friendly. In the "Other" option, you can set bold, italics, shadows, etc. Tip 2: Batch convert a specific font to a picture If special fonts are used in PPT, when playing on other computers, there may be a phenomenon of missing fonts. If the fonts are embedded in PPT, the files will be large, and some copyrighted fonts cannot be embedded in the PPT. middle. So the easiest way is to convert the text with a special font into a picture, but if one of the conversion is undoubtedly very tedious, it is best to complete the PPT after a single finalization, LvyhTools can achieve a certain application will be applied A special font text box, batch converted into a picture. Switch to "LvyhTools" option (Figure 3), click on the "Font Picture" pop-up dialog box, select the special font used, then select the "Picture" below, click the "OK" button to convert the special font in the document For pictures, if the converted picture is to be resized, it is recommended to convert it to "vectorized" so that it will remain clear after magnification. If there are few special texts to be converted, you can use the OneKeyTools plug-in. After selecting the text, click on "One-Click Transfer" (Figure 4) and select "In-Place PNG". This will directly replace the current position. Tip 3: Split text in batches If you want to split a paragraph into several text boxes, or even split it into a single word, the operation is very simple, but it is very tedious and easy to handle with OneKeyTools. If you want to split large paragraphs into small paragraphs that are spread across multiple text boxes, first press the Enter key to segment the large paragraph, then select the paragraph to switch to the "Onekey" option, click the "split text" to select "by paragraph split Points (Figure 5), you can generate multiple corresponding text boxes. Selecting "Unbundle" will generate a text box by word, which is very useful when doing a cover and animating. Batch processing pictures Tip 1: Import photos in bulk If multiple pictures are imported into one slide, in the Insert Picture dialog box, hold down the Ctrl key, select multiple pictures, and import them all at once. If multiple pictures are to be distributed on multiple slides, switch to the "Insert" tab, click the "Album" pop-up dialog box (Figure 6), click the "File/Disk" button to add pictures, in the "Album" "Layout" can set the number of pictures in each page, you can also set the shape of the picture in the bottom, and finally click "OK" button to add pictures in batches. Tip 2: Batch Formatting The pictures added in batches can be of different sizes. You can select all the pictures at this time. Right-click and select “Size and Position†to modify the size of the picture. Enter the corresponding value in “Width†or “Height†(Figure 7). If you want to forcibly set the width and height, deselect "Lock aspect ratio". If you want to set the format, you can also select the picture, switch to the "Format" tab, set the volume. In addition, we can also use the "format brush" to quickly apply a picture format to other pictures. Tip 3: Batch cropping pictures The pictures added in batches may not be the same in proportion. If the width and height are forcibly set, the pictures may be distorted. Therefore, the pictures may also need to be uniformly clipped. You can use iSlide to crop the pictures in batches. Select the picture and switch to "iSlide" option. Click "Design Typography" to select the "Plot picture" pop-up dialog box (Figure 8). Set the width and height of the picture and click the "Crop" button. Tip 4: Batch typesetting pictures Multiple pictures scattered in the layout, you can quickly typeset, select all pictures, switch to the "Format" tab, click "Picture layout" (Figure 9) There are a variety of layout options, select the picture will be automatically typeset. Tip 5: Batch Export Pictures The export image contains two kinds of requirements. The first one is to export all the pictures in the PPT to a single file for another use; the other is to export the entire PPT page to a single picture or a picture. Confirm that PPT is a high-level format (pptx), open a compression tool such as WinRAR, select "File → Open Compressed File" pop-up dialog box (Figure 10), select "All Files", and then open the PPT file, open to see A lot of folders, enter the Media folder under the PPT folder, there are all picture files in PPT, and finally extract the files to the corresponding file. If you want to export all pages in PPT as pictures, select "File → Save As" and select the format as "Picture Format" (JPG, PNG, etc.). This will save all pages as pictures. Using iSlide to export pictures is even more flexible. Switch to iSlide and click “Safe Export → Export Picture†(Figure 11). You can select the slide's export range and picture width, which is missing from the PPT's own features. Click "PPT puzzle", you can export all PPT pages into a picture, where you can set the number of horizontal pictures, margins, spacing, watermarks, etc., very powerful. NINGBO LOUD&CLEAR ELECTRONICS CO.,LIMITED , https://www.loudclearaudio.com